Casting Resin Guide: Create Stunning DIY Projects Today
Whether you're a hobbyist, DIY enthusiast, or professional artist, casting resin is one of the most exciting materials you can work with. Its versatility, durability, and ability to create crystal-clear, vibrant, and long-lasting finishes make it a favorite in the world of art and design.
In this comprehensive guide from Touchwood Design, we’ll take you through everything you need to know about casting resin—what it is, how to use it, popular project ideas, and tips for achieving flawless results.
What is Casting Resin?
Casting resin is a two-part epoxy or polyurethane compound that hardens into a solid, transparent form when mixed and cured properly. Unlike coating resins (used for thin surface layers), casting resin is designed for deep pours, making it perfect for embedding objects, creating river tables, molds, jewelry, and more.
Why Choose Casting Resin for DIY Projects?
- Crystal-Clear Finish: Casting resin cures to a glossy, glass-like surface, perfect for artistic projects.
- Durability: Once cured, it's heat-resistant, impact-resistant, and waterproof.
- Creative Freedom: Use it for wood-resin furniture, embedded artwork, jewelry making, or sculpture.
- Custom Colors: Pair with pigment powders or liquid dyes to create dazzling effects (Explore our Pigment Powder collection).
How to Use Casting Resin: Step-by-Step
Creating with casting resin is easier than you might think. Follow this step-by-step guide to get started:
1. Prepare Your Workspace
Ensure a dust-free, well-ventilated area. Lay down a plastic sheet and have gloves, mixing cups, stirrers, and your mold or project surface ready.
2. Measure and Mix
Use precise 1:1 (or 2:1 based on the resin type) measurements of resin and hardener. Mix slowly to reduce bubbles.
3. Add Pigments or Inclusions
Mix in colorants, mica powders, dried flowers, glitter, or stones for a custom design.
4. Pour and Shape
Carefully pour into your mold or over your object. Use a heat gun or torch to remove surface bubbles.
5. Cure and Finish
Let your piece cure for 24–72 hours. After curing, you can sand, polish, or apply a topcoat for extra shine.
Popular DIY Projects Using Casting Resin
Here are some creative ideas using casting resin:
✨ Resin Coasters
Create stylish coasters with pigment swirls, embedded leaves, or gold flakes.
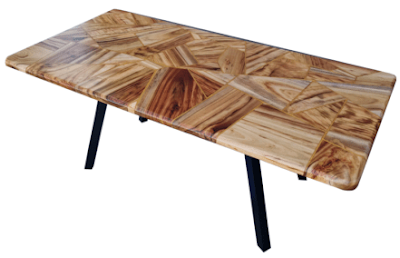
🌊 River Tables
Pair resin with wood slabs to build unique furniture with a river-like visual effect.
💍 Resin Jewelry
Design rings, pendants, and earrings with embedded botanicals or glow-in-the-dark pigments.
🎨 Wall Art
Pour resin onto canvas or wood panels for abstract fluid art masterpieces.
🕯️ Candle Holders
Cast colorful molds with clear resin for handmade decorative pieces.
Looking for supplies? Visit our Casting Resin Collection to shop premium-grade resins and accessories.
Pro Tips for Working with Casting Resin
- Temperature Matters: Resin performs best at 21–25°C. Too cold = bubbles; too hot = yellowing or cracks.
- Avoid Moisture: Even a small amount of water can cloud your resin or cause bubbles.
- Use Silicone Molds: They're flexible, reusable, and easy to de-mold.
- Seal Wood Before Pouring: Prevent air from escaping the grain and forming bubbles.

Common Mistakes to Avoid
- Incorrect Ratios: Always measure resin and hardener by volume (not weight) unless specified.
- Overmixing: Stir gently to avoid trapping too much air.
- Pouring Too Deep: Check your resin’s maximum pour depth—most casting resins can go 1–2 inches deep.
- Ignoring Cure Time: Allow full curing before sanding or finishing.
FAQs About Casting Resin
Q1. What’s the difference between casting resin and epoxy resin?
Casting resin is meant for deep pours (over 1 inch), whereas epoxy coating resin is used for surface layers. Casting resin cures slower, allowing bubbles to escape naturally.
Q2. How long does casting resin take to cure?
Typically, 24 to 72 hours depending on temperature, humidity, and pour depth. Touchwood Design resins offer fast curing without compromising clarity.
Q3. Can I use casting resin outdoors?
Yes, but choose UV-stabilised options to prevent yellowing. Consider a UV-resistant topcoat for added protection.
Q4. Can I sand and polish casting resin?
Absolutely! Once cured, casting resin can be sanded and polished for a high-gloss finish. Wet sanding works best to avoid scratches.
Q5. Is casting resin safe to use at home?
Yes—when used as directed in a well-ventilated area and with gloves. Always follow manufacturer guidelines for safe handling.
Why Buy Casting Resin from Touchwood Design?
At Touchwood Design, we offer:
- ✅ Premium Casting Resins – Crystal-clear, low-bubble formula perfect for art and woodworking.
- 🎨 Vibrant Pigments – Browse our Pigment Powders and Liquid Dyes for perfect blends.
- 💡 Expert Support – Get tips and advice tailored to your project.
- 📦 Fast Shipping Australia-Wide – Delivered to your door in eco-friendly packaging.
🛍️ Shop Casting Resin Now and bring your creative vision to life with trusted quality and vibrant results.
Final Thoughts
Casting resin is more than a material—it’s a gateway to endless creativity. Whether you’re designing custom furniture, artistic décor, or one-of-a-kind gifts, mastering Casting Resin opens up a world of DIY possibilities. And with Touchwood Design’s top-quality resin and pigments, you’ll have the tools you need to succeed.
🔥 Ready to Get Started?
Transform your next project
with Touchwood
Design’s Casting
resin collection.
👉 Browse Now and make your DIY
dreams a reality!


Comments
Post a Comment